Desk Pencil & Tool Caddy
Sturdy 3-compartment desk storage organizer with 3mm Baltic birch half-lap slotted dividers.
Use this templateSign in or create a free account to use it.

Set the size. Get a laser file.
A three-compartment caddy for pens, rulers, scissors and tools. Set its size and PrintCut draws the base, the four walls and the dividers, with every joint and slot sized to your material.
Type the outside size, or switch to inside sizes when what goes in it matters: PrintCut adds the walls for you. Width and depth go from 25 to 350 mm and height from 15 to 350 mm, or start from a preset: Small, Medium, Large, Pencil or Cube. Pick your material and its thickness, and every part redraws to match. Turn the box around in 3D, assembled or laid flat, before you cut anything.
Joints that fit
Every edge is finger-jointed, and the fingers are drawn for the thickness you chose. Set the finger width (5 to 25 mm) for the look you want, and the kerf (0 to 0.30 mm) for how much your laser burns away, so the joints press together snugly instead of falling apart or needing a hammer.
Dividers that slot together
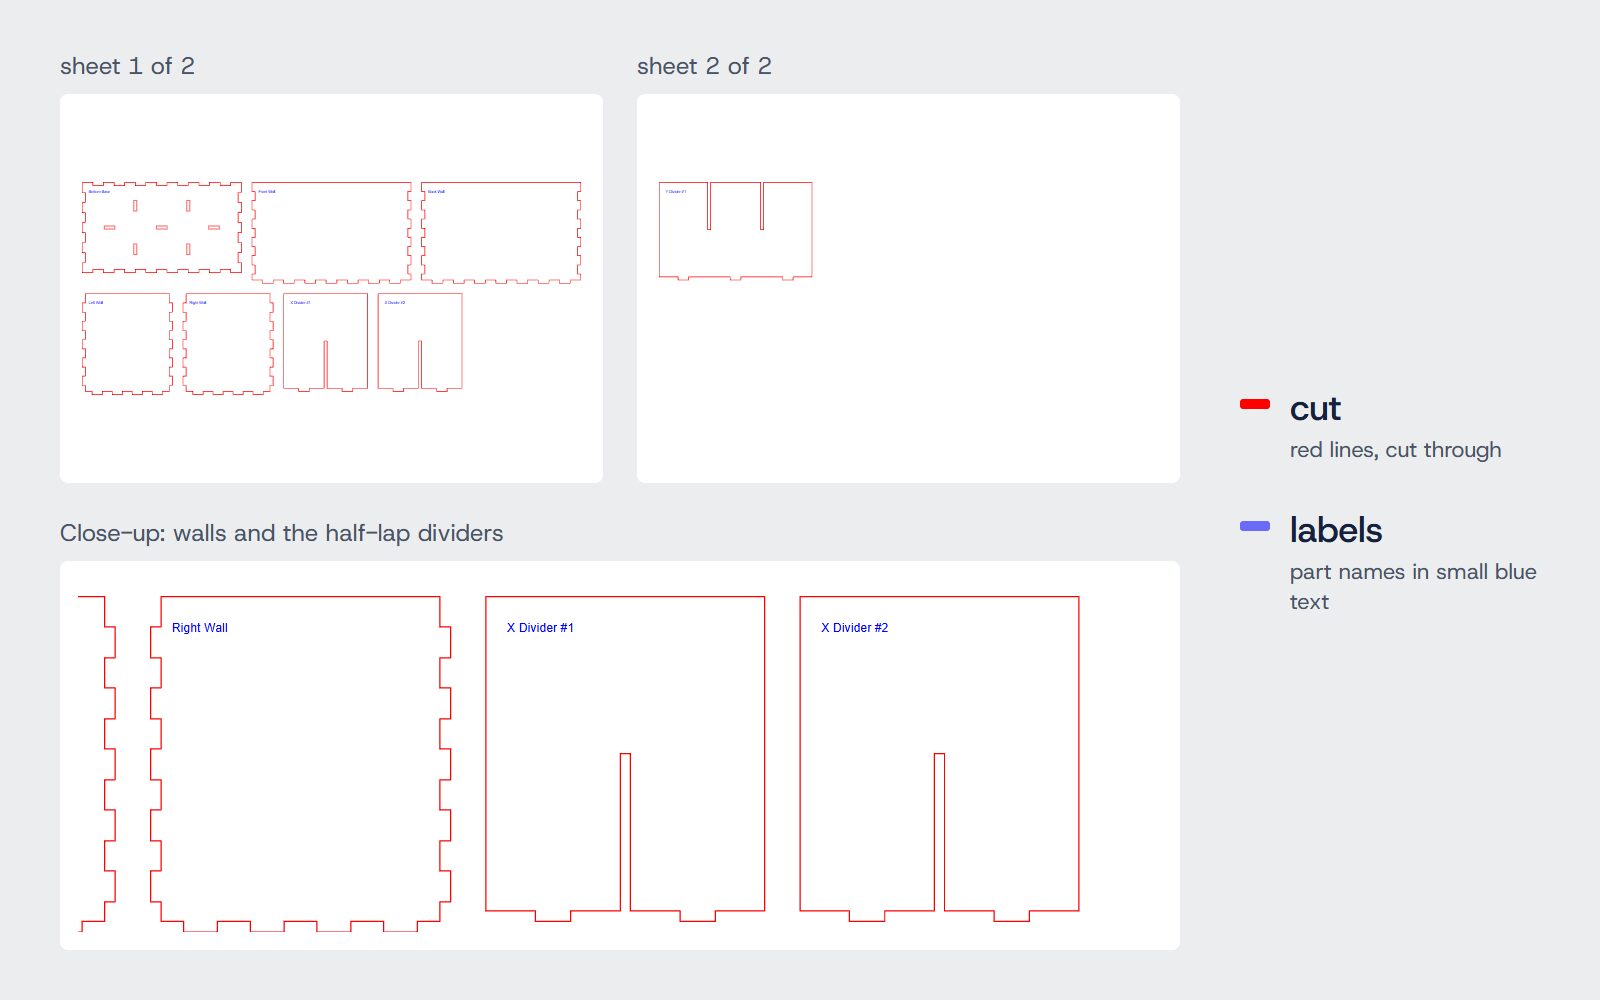
Choose how many dividers run each way, up to six each way. They cross with half-lap slots, each cut halfway down, so they slide into one another and stand without glue. The base gets matching slots so the dividers stay put.
What you get
- Base: with slots that hold the dividers.
- Four walls: front, back, left and right, finger-jointed to each other and to the base.
- Dividers: two one way and one the other by default, with half-lap slots where they cross.
The cut file
Download an SVG for LightBurn, xTool or Glowforge with each kind of line on its own colour-coded layer, a DXF for CAD software, or G-code for GRBL and Marlin machines. The parts are laid out on your laser’s bed for you, with the total cutting length and an estimate of the cutting time. When they need more than one sheet, each sheet is its own file in one zip. Part names are written in small blue text at each part’s corner; untick them if your laser program would burn them.
Built for the machine, not just the screen
- Parts are packed onto your laser’s bed; anything bigger than the bed is split for you.
- Kerf compensation widens every finger and narrows every slot by half the kerf, for a tight friction fit.
- The total cutting length and an estimated cutting time are shown before you export.
Assembly
- Cut every sheet.
- Press the walls into the base, corner by corner. A little wood glue in the joints makes it permanent.
- Slide the dividers together at their slots, then lower them into the caddy.
- Sand any burnt edges lightly.
Cut it from 3 mm birch plywood for a desk, a workbench or a craft table, or make one to fit a drawer exactly.