Two-Sided QR Tag
A small tag cut once and engraved on both sides: your shop name, a message, emoji or your own pictures on the front, a QR code on the back. Move, turn and curve every line.
Use this templateSign in or create a free account to use it.
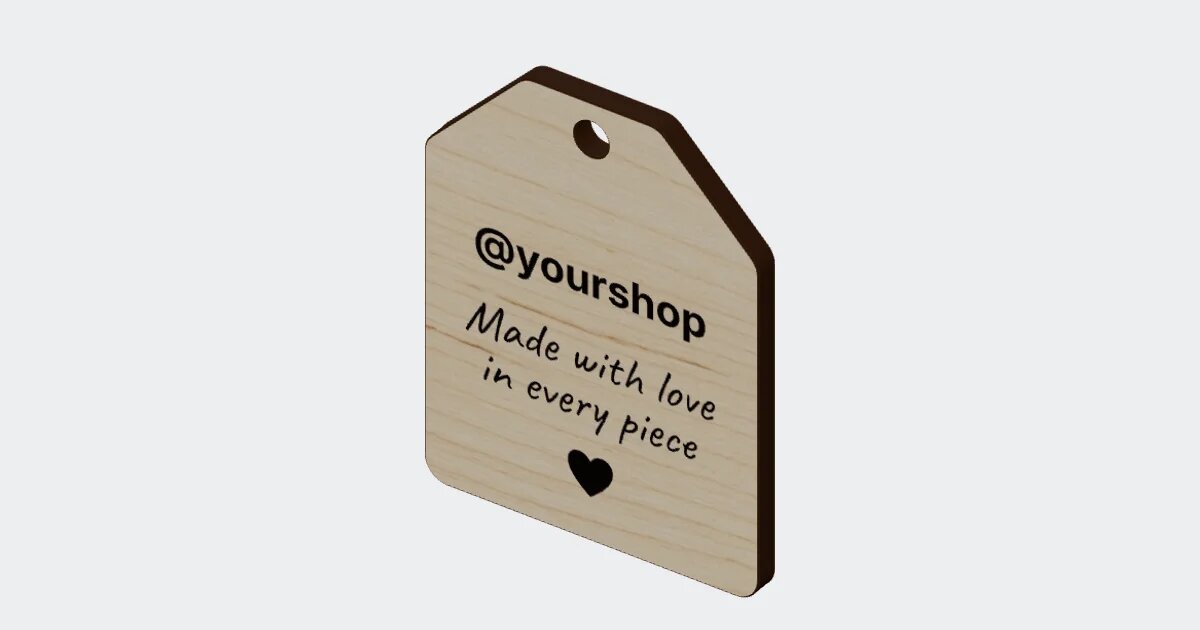
Two sides, one tag
A small tag engraved on both sides: your shop name, a message, emoji or your own pictures on the front, and a QR code on the back that takes people to your shop, your socials or a thank-you page. It is cut once and flipped, so both sides line up.
Design the front freely
Add as many text lines as you like, each with its own font, size, bold, italic, letter spacing, curve and turn, then move them in the 3D view and resize or turn them in 2D. Center all puts every line back in the middle. Upload a logo or picture and it is traced into engraving. Emoji and symbols can be typed straight into a line.
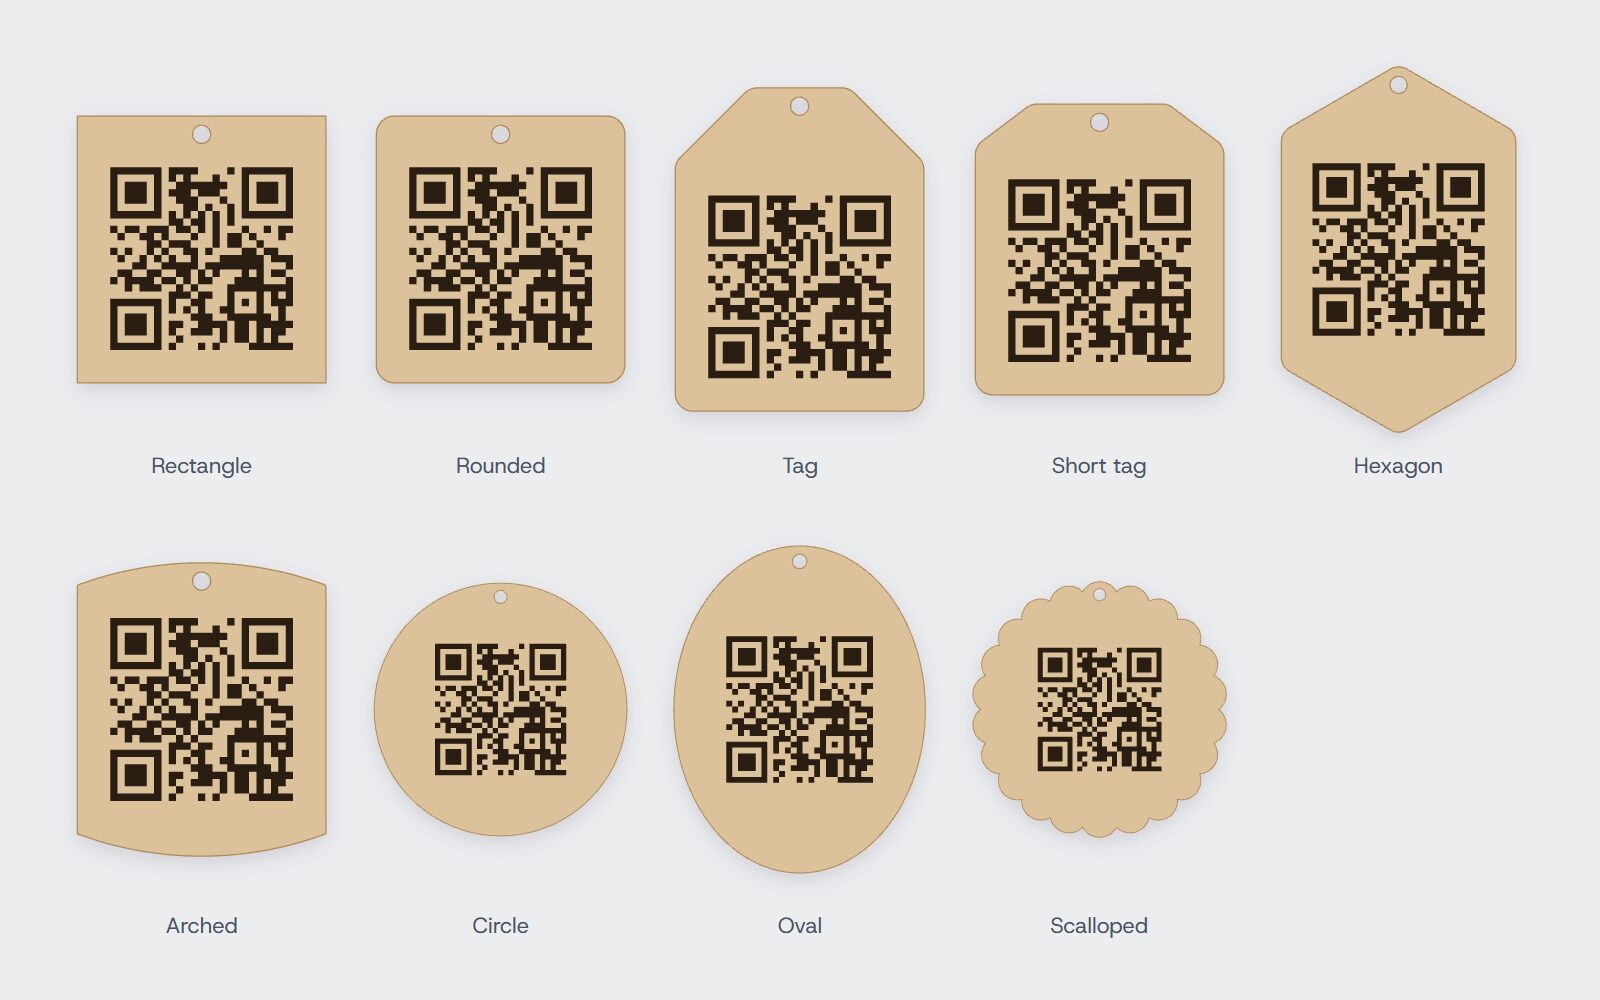
Any shape, any code
The back takes everything the QR plate does: a link, text or Wi-Fi network, dot and corner styles, a centre logo, a caption, or a barcode instead. The tag comes in the same nine shapes, with a round hole or slot to thread a string through.
What you get
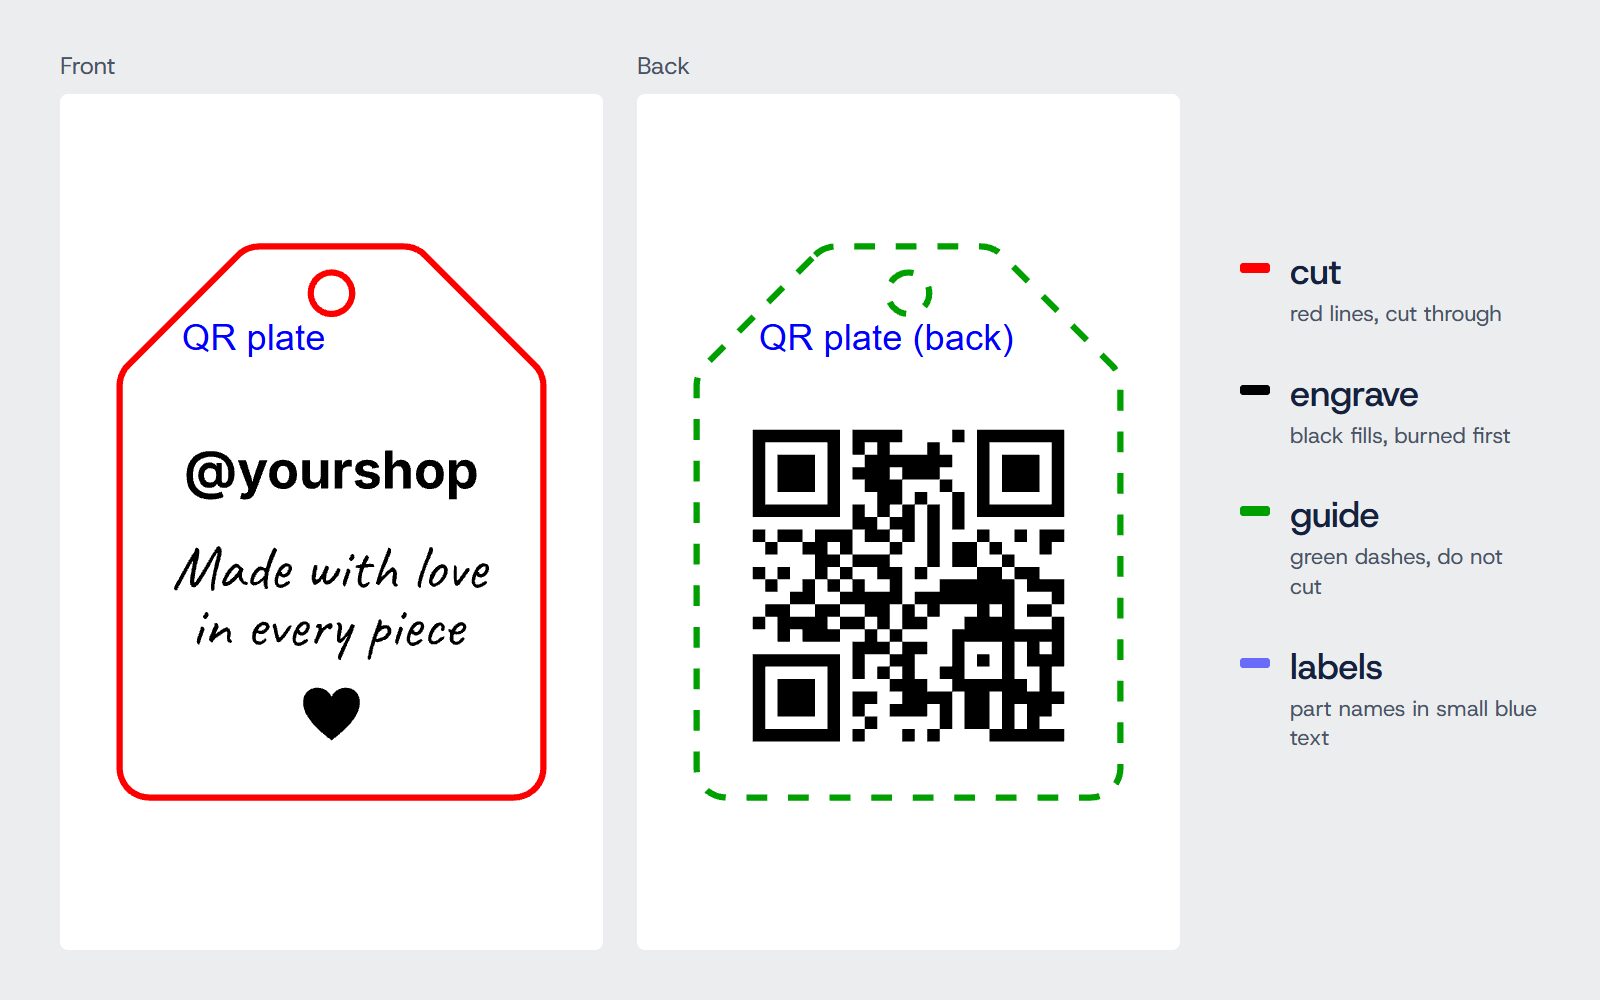
- Front file: the front’s engraving, the hanging hole and the tag’s outline to cut.
- Back file: the QR code to engrave, with the tag’s outline as a green guide that is not cut.
Two files, one tag
Download an SVG for LightBurn, xTool or Glowforge with each kind of line on its own colour-coded layer, a DXF for CAD software, or G-code for GRBL and Marlin machines. The parts are laid out on your laser’s bed for you, with the total cutting length and an estimate of the cutting time. The front and the back are two files in one zip. Part names are written in small blue text at each part’s corner; untick them if your laser program would burn them.
Making it
- Run the Front file: it engraves the front and cuts the tags out.
- Flip each tag left to right and drop it back into its own hole in the sheet.
- Run the Back file with the guide layer’s output turned off: it engraves the QR code on the back.
- Scan the code with your phone, then thread a string or ring through the hole.
Cut a batch from 3 mm plywood and tie one to every parcel, gift bag or market-stall product.


